Friday, May 31, 2013

Cab bed repair - Part 10

After installing the aluminum shell over the front wall, it's time to install sealant around the edges where the insert trim will be installed.  I used putty tape for this which made the install clean and simple.  Unroll the putty tape, apply to the edges, and then remove the paper backing and install the aluminum trim over the putty.  The tape comes in various widths.  I used 1 1/2 inch width for the corners.
I bought the tape here: Adventure RV Putty Tape


Cab bed repair - Part 9

It's time to install the front wall.  To make things easier, I went ahead and wallpapered the side walls first, since I have more room to work when the front wall is out.  I also install the new shelf before installing the front wall.

Here are before and after photos with wallpaper.  The paper on the wall is tan, so it's hard to tell a difference in the small images.  You can also see the white wallpaper used for the ceiling.

These are photos of the new shelf.


We use the old front wall to copy dimensions for building the new wall.  You can see part of the old wall at the top of the photo.  We will also wallpaper the wall before reinstalling in the cab.


Once we set and install the front wall, it's time to add the insulation.
 The wires across the top are for the amber running lights.


Monday, May 6, 2013

Cab bed repair - Part 8

Time to install the new bed frame.  Definitely a two person job.  The fit was nice and tight, so the frame required some gentle help at the last inch using a small sledge hammer.

These two photos show a nice snug fit with the side wall.  The temporary support beam was reinstalled to support the new bed and will remain in place until the new front wall is completely built.


Here's a view from the inside.

Sunday, May 5, 2013

Cab bed repair - Part 7

I didn't notice until a couple days into repairs that the main side wall was starting to shift.  We installed some lag bolts and brackets to connect a Come-Along winch.  If I could do it over, I would have installed the Come-Along as the first step to ensure the wall didn't move.


Saturday, May 4, 2013

Cab bed repair - Part 6

We were able to recover and reuse the fiberglass sheet that mounts on the outside bottom of the bed.  We used a fine sanding pad to remove original wood and glue residue.


Attaching a 2x4 along the side of the bed provided a stop ledge for us to use when laying the fiberglass sheet on the bed frame.  Without the ledge, it would be more difficult to align and square the fiberglass sheet.  We used contact cement on the plywood and fiberglass sheet and then laid the sheet on the plywood bed.  The 2x4 is then removed.


Friday, May 3, 2013

Cab bed repair - Part 5

I mentioned in an earlier post that the new side walls would have to compensate for the difference in the new bed frame vs the old.  Here's a side by side photo of the old aluminum and the new wood
frame.


The original wall height below the window was 9 1/2 inches while the new height would be 8 7/8 inches.  Here's a photo of my sketch to determine dimensions and how I would place the screws.


I had to remove additional damaged plywood under the window and rebuilt the wall using the dimensions listed above.


Tuesday, April 30, 2013

Cab bed repair - Part 4

It was a little bit of a challenge removing the aluminum bed frame from the cab.  You can see in this picture the rubber seal on the van roof.  There was a bead of putty holding the sheeting and frame to it, so we had to carefully pry it from the van roof.  The bed frame is also screwed to the van roof, so all screws needed to be removed from there, as well as the ones screwed up into wood side walls.  Here are some photos with the bed frame removed.


We were able to separate the fiberglass sheeting to use it on the new bed frame.

This is the aluminum bed frame.

After closer inspection, the aluminum has holes and structural problems.  We now have to build a new bed frame.

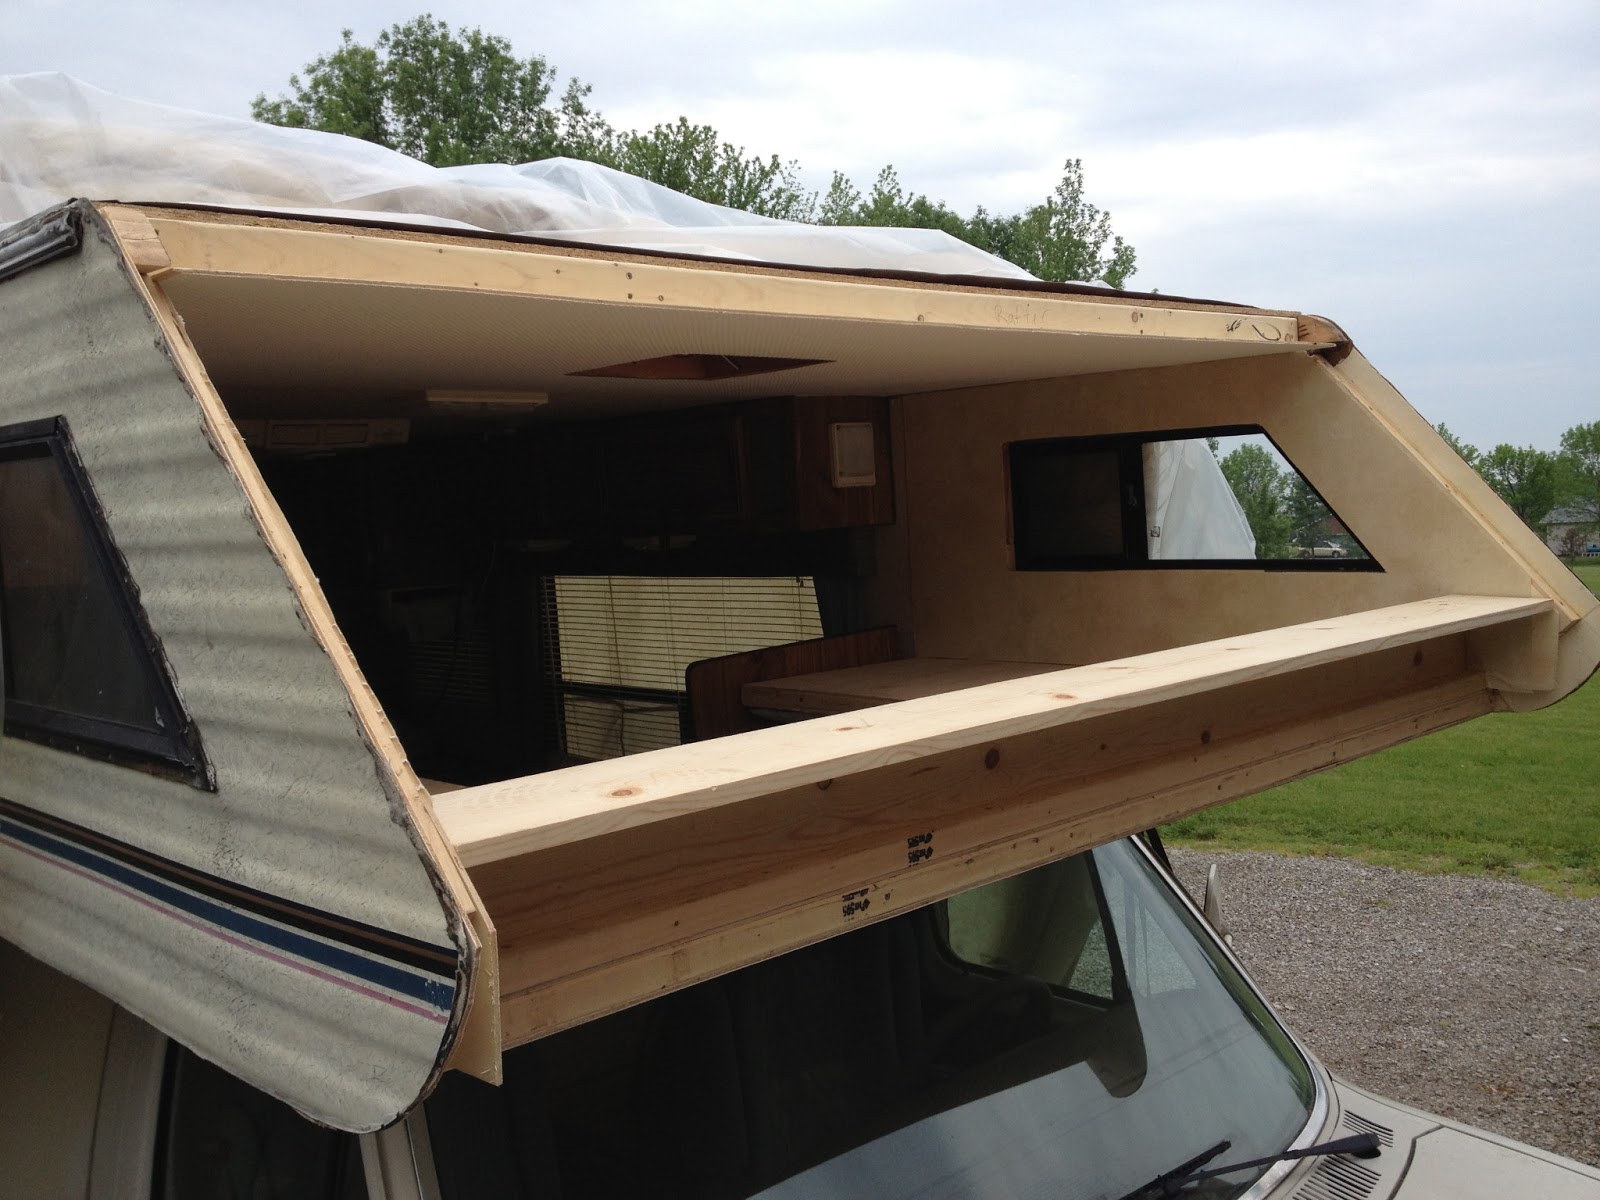
The new bed frame is made from 1.5" x 1.5" boards.  When we rebuild the cab walls, it will be important to remember to compensate for the thicker bed frame.  Each joint is glued, air nailed, and screwed.  We only used the nails to hold it together so we could get some screws into it.  Also use a framing square to keep it nice and square.  If you compare it to the photo of the original frame, you will see we included a lot more cross member supports.


This shows where we placed a good bead of wood glue on the entire frame.

We then attached the 1/4" plywood sheeting and attached with staples applied with an air gun.  Here you can see the framing laying on the plywood after we turned it over to insert the insulation.

For the insulation we used Corning 1" thick foam board.